Thank you everyone who participated! The Winner is................. Elven Marie Johnson Everyone who entered I will send you a 15% off coupon to my Etsy store just for entering! I Thank you all so Much and please check back because are next giveaway will start in a few days! We will giveaways often and of course your daily dose of upcycled tutorials!!! Thanks agian <3 shana
Every so often I can go through my families and my own closet and find some stuff that I am tired of looking at, but instead of throwing them in that goodwill dumpster, or just throwing them away, I have compiled these tutorials so everyone can clean out there closets and revamp there old threads! I hope everyone enjoys and, let me know what kinds of tutorials you have tried!!
****Also I am looking for Guest bloggers to write on my Blog, if you are interested please email me
Rubbishlove22@gmail.com
<3 Shana
1. Diy Plant hanger from T-shirt!
2. Revamp those old Flip-flops 3.T-Shirt Backpack
Materials
T-shirt
Sharp scissors
Needle and thread
Large safety pin
Clothesline cord, about 6 times the width of the shirt
7/16-inch eyelet (or grommet) kit (see tip below)
Instructions
Turn the T-shirt inside out, then cut across the
shirt from armpit to armpit. You'll need only the bottom section.
Use the needle and thread to sew a simple stitch
across the shirt, about a half inch in from the cut edge, to seal what
will be the bottom of the bag.
Turn the shirt right side out. Snip the shirt's
hem almost all of the way through (do not cut any stitching) at the
midpoint between the two side seams. Attach a large safety pin to one
end of the clothesline cord. Feed the cord, safety pin first, through
the casing of the hem.
Follow the eyelet or grommet kit instructions to add eyelets to the bottom corners of the bag.
Thread the ends of the cord through the eyelet holes and double-knot them to secure.
Tips:
An eyelet or grommet kit can be purchased at craft stores or
online for around $15. In a pinch, you can cut the holes with scissors
and seal the cut edges with fabric glue, but the result won't be as neat
or as sturdy.
Due
to several questions about this tutorial, I decided to post an update
with more detailed steps. You can find the tutorial below:
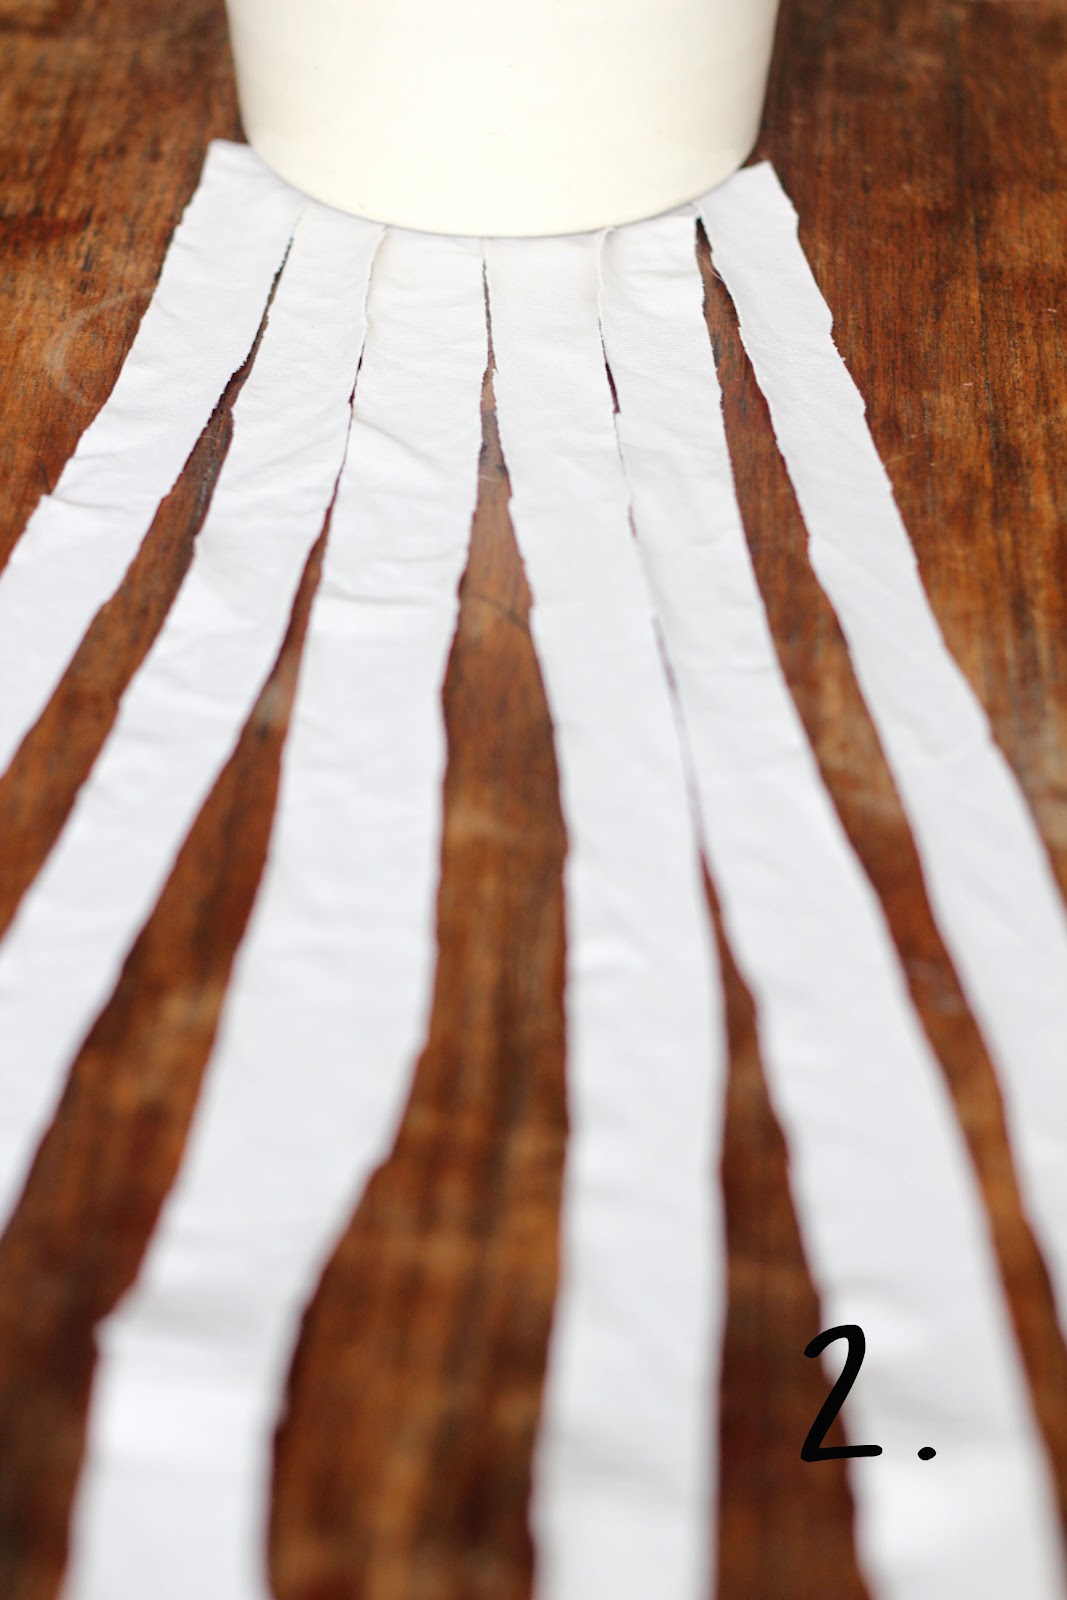
1. Take 6
pieces of fabric, mine are about 45 cm long and 1,5 cm wide. Place
something heavy on the toppart to keep them in place.
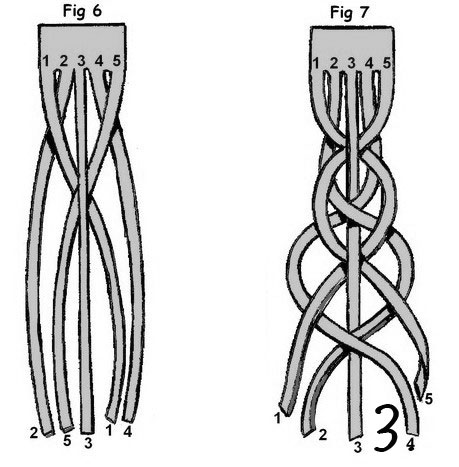
2. Take right strip and follow the red line in the picture.
3. It should look like this.
4. Take the left strip and follow the red line in the picture.
5. It should look like this.
6. Now repeat steps 2 and 4. Pull on them, but not to tight!
7. Keep braiding until you have ure desired length.
8. Get you're glue gun or some textile glue and place a stripe of glue on top of the end. Do this on both sides.
9. Cut the fabric that is on the other side of the glue strip. Not the braided side!
10. It should look like this.
11. Put some glue on the outside of the braid, like shown in the picture.
12. Place the other outside against it and push them together until the glue has dried.
13. Measure the width of youre braid.
14. Cut a piece of fabric. The size should be 2x the width of your braid + 1 cm.
15. Fold the piece of fabric around the part where the bracelet is attached. And glue it together.
All done!
You can of course also sew the bracelet instead of using glue.
The bracelet will be easy to slide over you're hand, because the fabric is stretchy and soft.
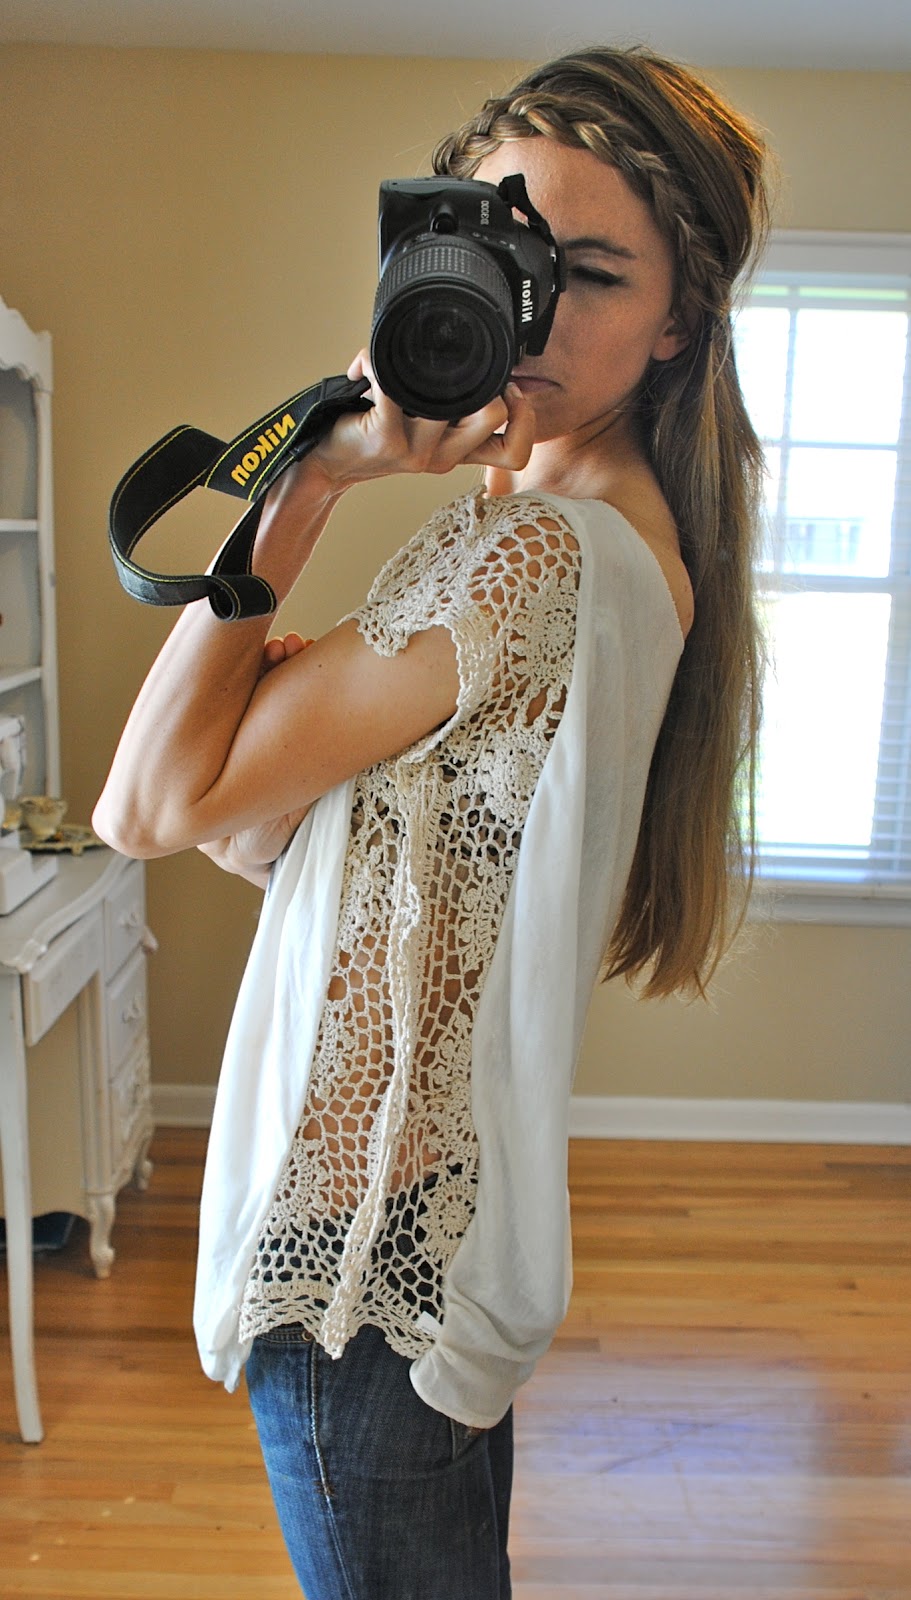
5.Up cycle Bouquet 6.Crochet Peek a boo Shirt ( one of my Fav's)
Supplies: Tshirt, crochet trim (a few yards)
I came up with this idea to make tight shirts wearable again. I had so
many cool tshirts yet most of them were purchased when it was trendy to
have them snug.
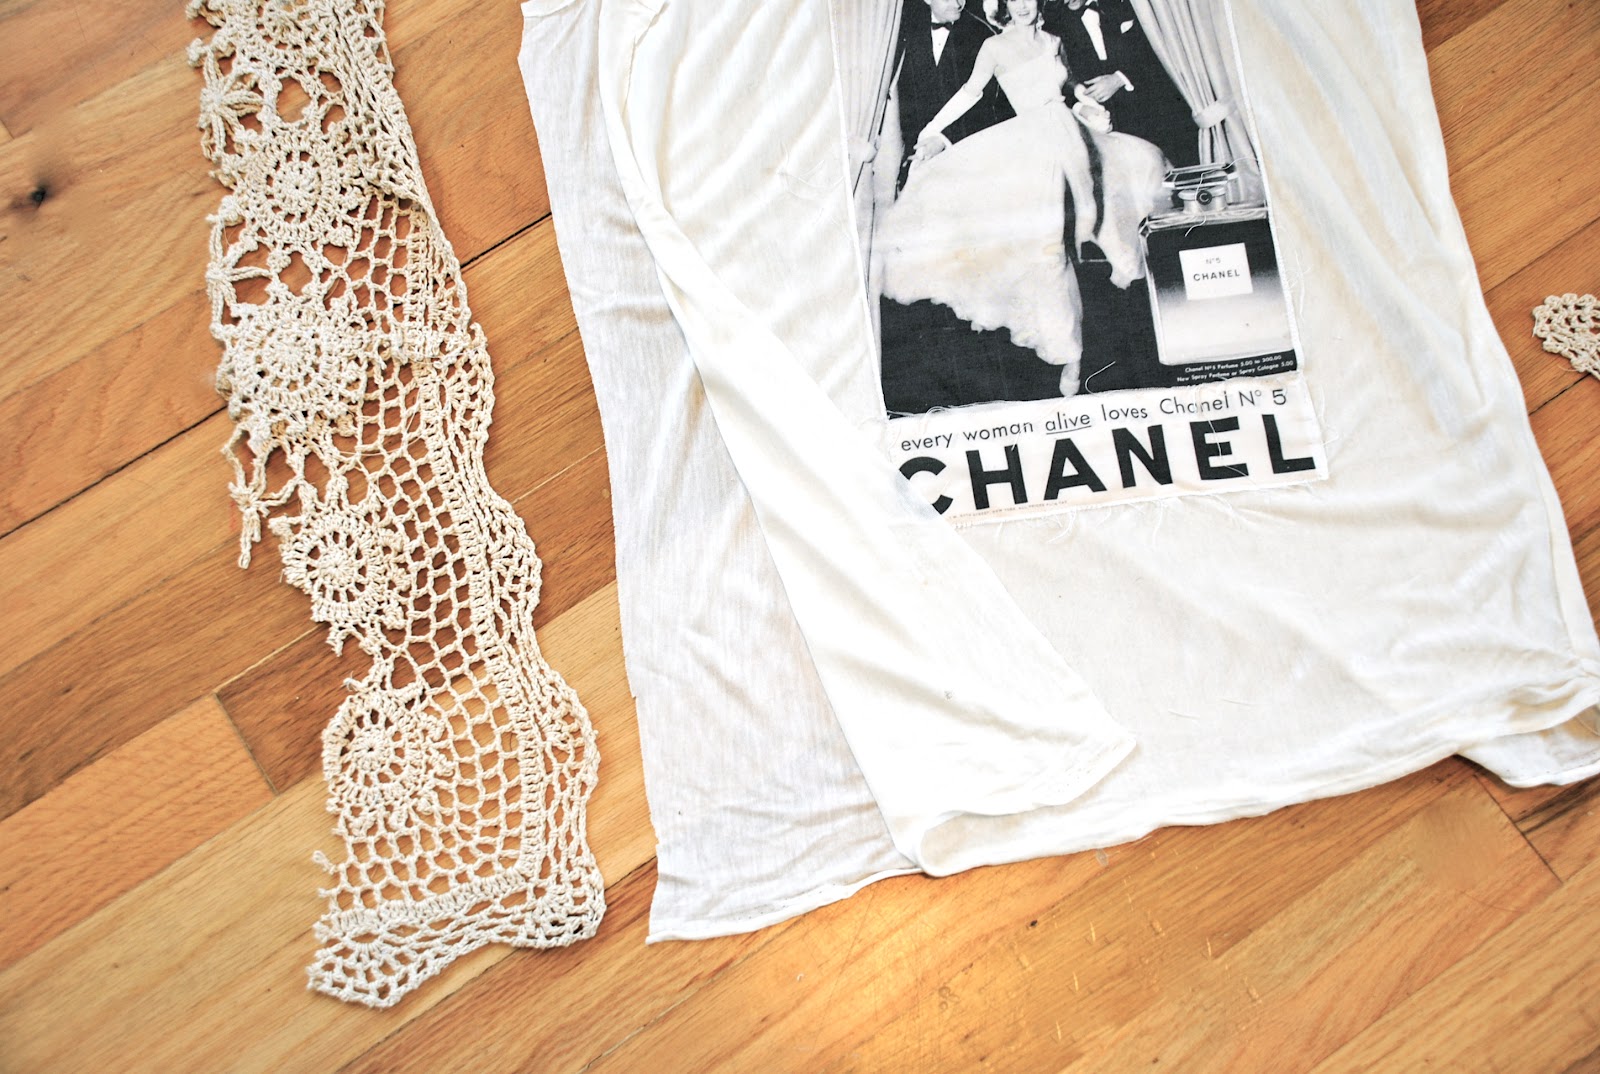
Measure the trim (you will do front to back).
Cut side seams and sleeves off if you use a tshirt (here I used a tank).
Sew front to back right sides together.
Lay out and pin where you want the armhole to go.
Top stitch new side seam leaving armhole open.
I did this with fringe trim as well here.
****Also with this you could use a lace curtains, or table cloth!****
7. Make continuousYarn from T-Shirt
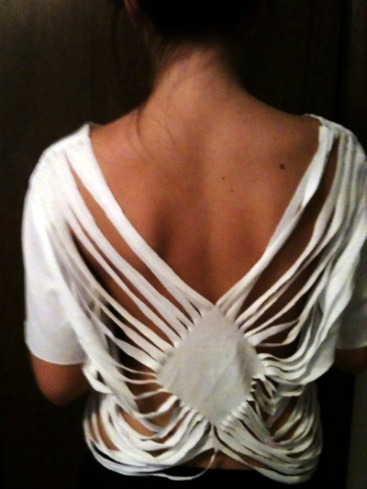
8. Sexy back T-shirt
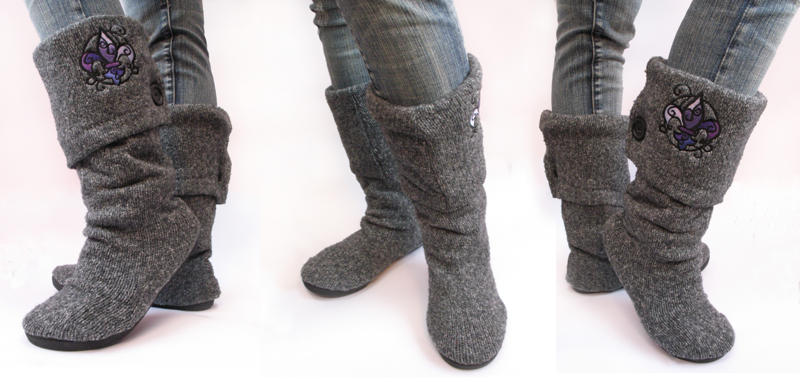
99.Boots from old Sweater! I started with this:
chopped off the sleeves, turned it inside out, and formed it to my foot.
Hot glued it to a shoe, like so...
flipped it right side out, and cut the bottom off the sweater to make a cuff..
Embroidered it..
Sewed it into a cuff that would flip out over the boot..
And now you have...Sweater boots!!
10. T-shirt totes
It's super easy to do! All you'll need is
an old cotton t-shirt, some sewing pins and thread, scissors- and
you're halfway there!
Cut off the sleeves and neck line t create your handles.
Pin and sew the bottom portion up.
Ok this was part one because there are so many more that we can do, so stay tuned I will be updating later today! :)
Good afternoon everyone , I am writing you from my workshop here in Dayton, Ohio. I started thinking last night about the holidays, and actually I feel like I am running behind. Most of my fellow Etsians have already listed there holiday items, but hey I am new to all this and still trying to get a custom to the whole routine!
So what I will be working on this week will be:
- Updating & Taking better pictures for my Etsy store
-Working on Holiday Gift tags
-Working on Holiday Greeting Cards
- Adding new signs& items to my store!
This week should be a busy one trying to catch up everything.
I will be posting tutorials for all the items all the new Items I will adding because, if you didnt know all of my items are upcycled so, i will be using items around the house and items that are trashed to use to make are Christmas Items! Also I will be finishingPart 2 of Going Green to Get some Green!
This should be an interesting week so I hope everyone follows and enjoys these posts, also feel free to comment I would love to hear from everyone!! I will talk to you soon!!
What am I talking about?
I wanted to share with everyone free ways to earn some extra money or may even try to build a business doing this. But I wanna talk about going green to get some green. what do I mean exactly, well I will explain ways to:
-obtain free items
- places that you can sell you items to
-resources
This way you can start making some extra cash. I will explain the benefits for you and your family and how easy it all can be.
Get Free Items
What do I mean by Items? I mean anything you can get your hands on that people are getting rid of:
-Plastic&Paper bags
-Tp rolls
-Milk jugs/cartons
-Water bottles
-Cereal boxes
-Any boxes from food items
-Canning jars( my personal favorite)
-Scrap wood
-Scrap material
-T-shirts/ clothes
-Old newspapers/ scrap paper
-Old books
You would be surprised if you ask your friends and family if they would save items for you or if they had items they wanted taken off there hands, what you will get. Most people have an unnecessary amount of clutter in there homes, garages, basements and attics and would be glad for you to get it out of there home, you never know what you will end up with. Sometimes I would go through my house and it was like a upcycle gold mine!
Another great place to get free items and one of my favorite is craigslist,, there free section is awesome. I have found a lot of amazing things through craigslist people get tired of something and they just want it gone, you can get great vintage items, funiture, wood, books.,etc... I got my Items ,what can I make?
Well lets just say the skies the limit on that so to make it more simple, I would start with one item.
Okay, say you start with plastic bags that you have collected,well for inspiration you can google:
-What can I make with Plastic Bags
-Upcycle plastic Bags
-Reclaim plastic bags
That was easy , the first page will bring up several amazing blogs with tutorials on what kind of different things you can make. For instance, plastic bags can be fused together by placing waxing paper over the bags and then ironing them together, you can make really cool totes. You can always add your own flare to these tutorials, make it your own then repost it and share!
Im going to share some pictures of amazing things you can make out of upcycled items...
All these items made from plastic bags
All these are toilet paper rolls
All these are canning Jars
All these are t-shirts
These are just a few examples of Items you can make with your upcycled stash!
There are so many resources on the internet for you to find, and let your imagination
go wild you never know what you could make it could be the next big thing.
I am going to be posting part 2 tommarrow so come back to read the rest of this post , I have a lot more to write about and I haven't even gotten to the best part, selling your items!! So good night


 Turn the T-shirt inside out, then cut across the
shirt from armpit to armpit. You'll need only the bottom section.
Turn the T-shirt inside out, then cut across the
shirt from armpit to armpit. You'll need only the bottom section. Use the needle and thread to sew a simple stitch
across the shirt, about a half inch in from the cut edge, to seal what
will be the bottom of the bag.
Use the needle and thread to sew a simple stitch
across the shirt, about a half inch in from the cut edge, to seal what
will be the bottom of the bag. Turn the shirt right side out. Snip the shirt's
hem almost all of the way through (do not cut any stitching) at the
midpoint between the two side seams. Attach a large safety pin to one
end of the clothesline cord. Feed the cord, safety pin first, through
the casing of the hem.
Turn the shirt right side out. Snip the shirt's
hem almost all of the way through (do not cut any stitching) at the
midpoint between the two side seams. Attach a large safety pin to one
end of the clothesline cord. Feed the cord, safety pin first, through
the casing of the hem. Follow the eyelet or grommet kit instructions to add eyelets to the bottom corners of the bag.
 Thread the ends of the cord through the eyelet holes and double-knot them to secure.